Clearing printer media jams
Occasionally, media becomes jammed during a print job. Some of the causes include the
following:
●
The input tray is loaded improperly or it is too full. See
Loading media into the input tray
for
more information.
●
The media does not meet HP specifications. See
Printer media specifications
for more
information.
Note
When you add new media, always remove all of the media from the input tray and straighten the stack
of new media. This helps prevent multiple sheets of media from feeding through the printer at one time,
reducing media jams.
You are notified of a media jam by an error in the software and the printer status lights. See
Status
light patterns
for more information.
Typical media jam locations
●
Toner cartridge area:
See
Removing a jammed page
for instructions.
●
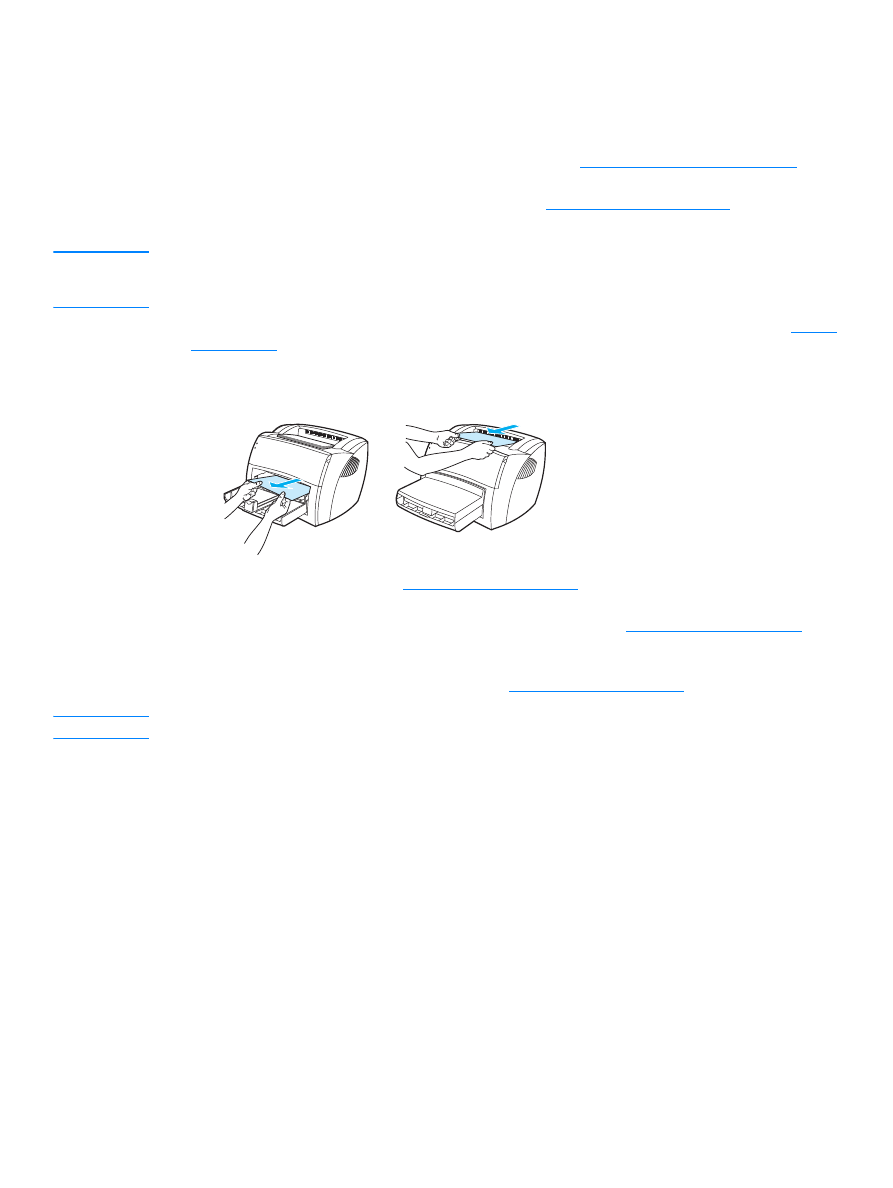
Input tray area:
If the page is still sticking out of the input tray, gently try to remove it from the
input tray without tearing the page. If you feel resistance, see
Removing a jammed page
for
instructions.
●
Output paths:
If the page is sticking out of the output bin, gently try to remove it without
tearing the page. If you feel resistance, see
Removing a jammed page
for instructions.
Note
There might be loose toner in the printer after a media jam. This toner clears up after a few sheets print.

52 Chapter 6 Troubleshooting the printer
ENWW
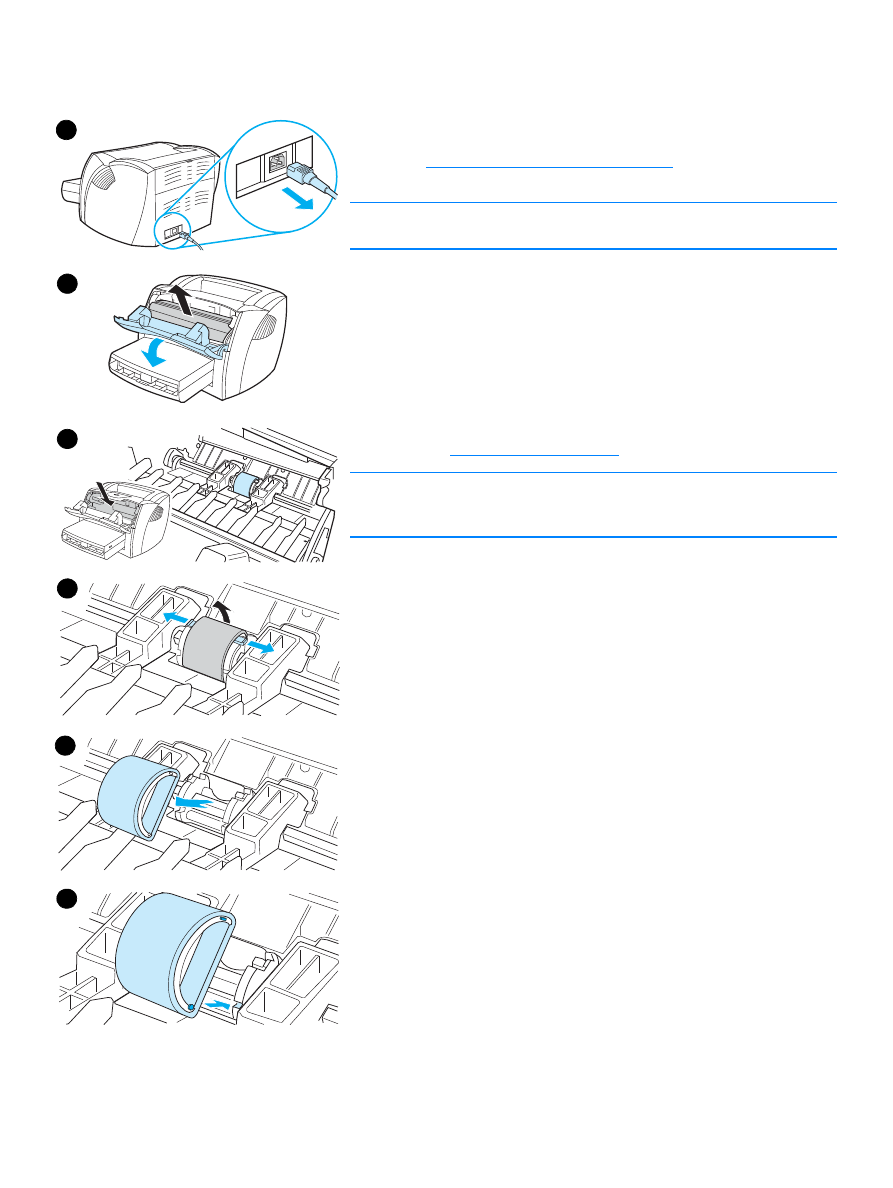
Removing a jammed page
CAUTION
Media jams might result in loose toner on the page. If toner gets on your
clothing, wipe the toner off with a dry cloth and wash the clothing in cold
water.
Hot water will permanently set the toner into the fabric.
1
Open the toner door and the straight-through output door.
2
Rotate the media jam release levers downward.
CAUTION
To prevent damage to the toner cartridge, do not expose it to light.
3
Remove the toner cartridge, and place it aside.
4
With both hands, grasp the side of the media that is most visible
(this includes the middle), and carefully pull it free from the printer.
Make sure that you check for jams in the toner cartridge area (A) and
the straight-through output path (B).
5
When you have removed the jammed media, replace the toner
cartridge, and close the toner door and the straight-through
output door.
Note
The media jam release levers automatically close when you close the
straight-through output door.
After clearing a media jam, you might need to unplug the printer and plug
it back in.
Note
When you add new media, remove all of the media from the input tray and
straighten the stack of new media.
1
2
3
4
5
ENWW
Changing the pickup roller 53